
Before painting a vehicle, sanding the car paint away and properly using sandpaper to smooth out cracks, dings and other imperfections is probably the most important step. Once the car has been repainted, sanding problems are usually very easily noticed, and will require that you sand again and start over. Whether you want to want to restore an old paint job or use a totally different color for your vehicle and make it look like a new car, here are some paint tips that will make sanding much easier and effective.
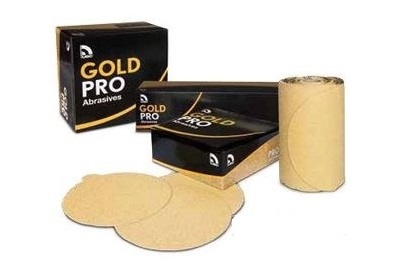
1. Choose the Right Sandpaper Grit
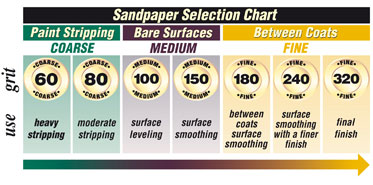
Always make sure you use the correct grit of sandpaper when sanding the vehicle. The grit of the sandpaper refers to the paper’s roughness and how quickly it can sand away paint and other materials on a surface. If you are attempting to sand all the paint and primer away so that the bare metal of the vehicle is exposed, you will want to choose rough 80 grit sandpaper in order to quickly accomplish this. You should also be aware that lower grit sandpaper can cause scratches in the vehicle’s surface that must then be sanded out with higher grit papers such as 150 or 300. If you want to remove almost all hints of scratches, higher grit sandpaper such as those between 800 and 1,000 may need to be used.
2. Use Sanding Blocks for an Even Finish
A sanding block is one of the most important tools you will use when repainting a vehicle. A good sanding block is approximately 12 inches long and the flat side of the block is covered with sandpaper. To use a sanding block properly, hold it with both hands and slowly sand the flat surfaces of your car. Sand in slow, deliberate and even strokes. This will allow you to slowly sand away the paint and primer. Carefully sanding with a sanding block will also reveal any high or low spots that may be on the surface of the vehicle.
3. Wet Sand for the Best Finish
In order to achieve the very best paint finish for your vehicle, you should wet sand the vehicle just before you start to paint. Once you have painted the vehicle, you should wet sand it again with a very fine grit sandpaper. Although you can use 300 to 400 grit or higher sandpaper for wet sanding, you should probably use 1,000 to 2,000 grit to achieve the best results. Be sure to keep the paper wet during the entire process of sanding, and never allow the paper to become dry.
This will allow you to lightly sand the vehicle without pushing paint or other debris back into the bare metal. Wet sanding is especially effective in removing any imperfections in the top layer of clear coat that protects the base coat or undercoat of paint. Once you’re done wet sanding, the finish will appear dull; it can easily be buffed out with a high speed buffer.